Automatic Facebook, Instagram account farming using Scenum
5/31/23


Sophia Grote
Support specialist, Octo Browser
Account farming is a set of actions imitating real users’ activities that is needed to avoid account bans by antifraud systems of social media. You can farm accounts manually, but if you need to use multiple accounts, a more rational approach would be to use automatic farming services. Today we’ll show you how they work using the Scenum service.
Getting started with Scenum
Start by registering on the official website scenum.io. The service offers you a 7-day trial period, during which you can farm up to 10 accounts. If you leave them your Telegram handle, a personal manager will be assigned to you to help you set up the system with your particular needs in mind. Ready-made farming scenarios will also be available to you.
Activate your account after registering and log into it using the data you will have received by email. The message will also contain a link to the extension itself: download and unpack it into a separate folder, and you’re all set to go.
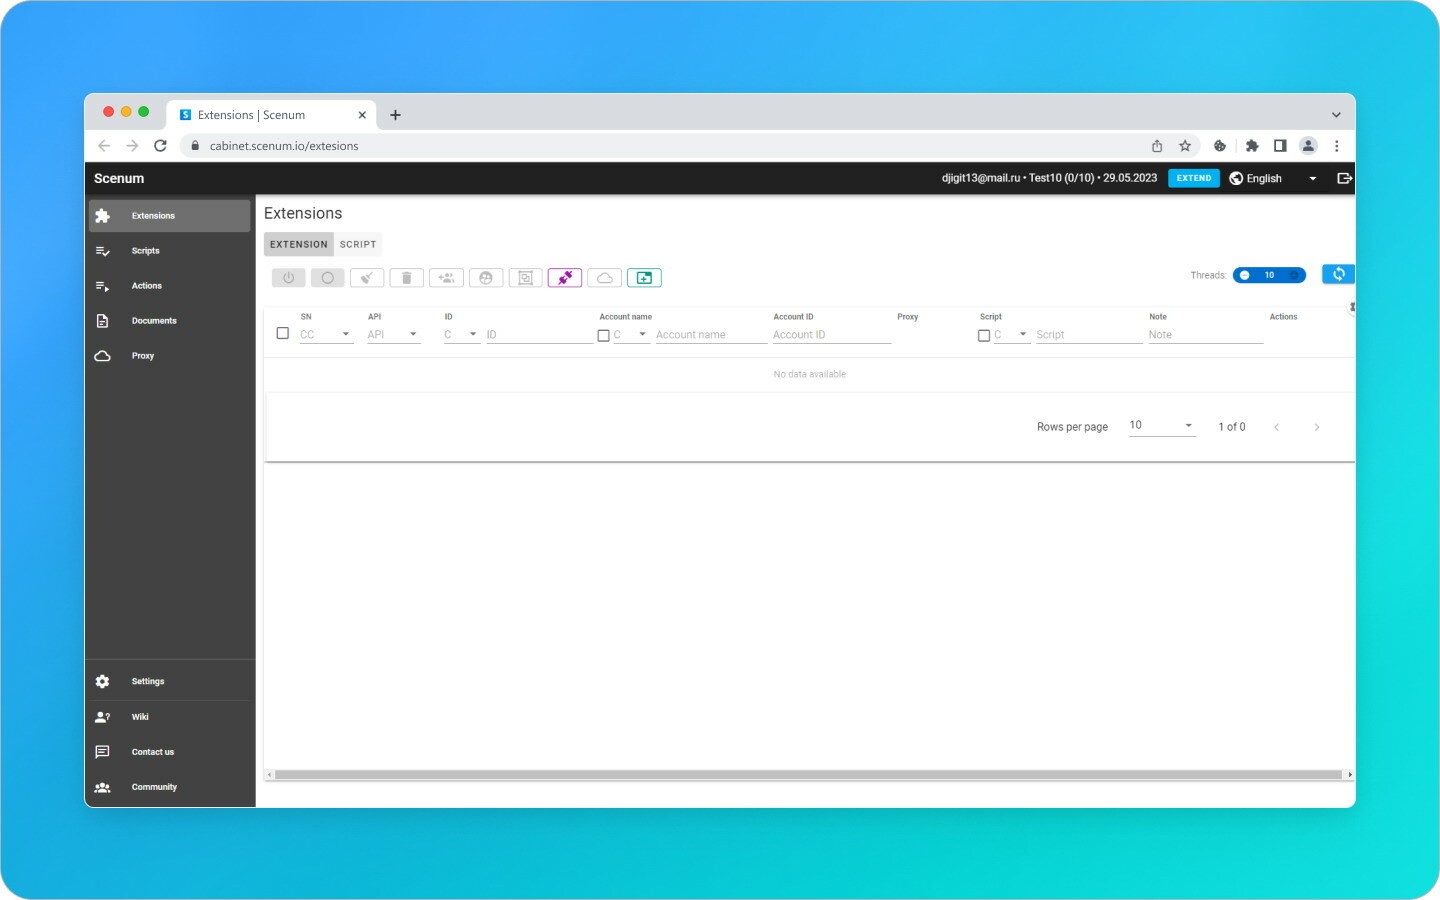
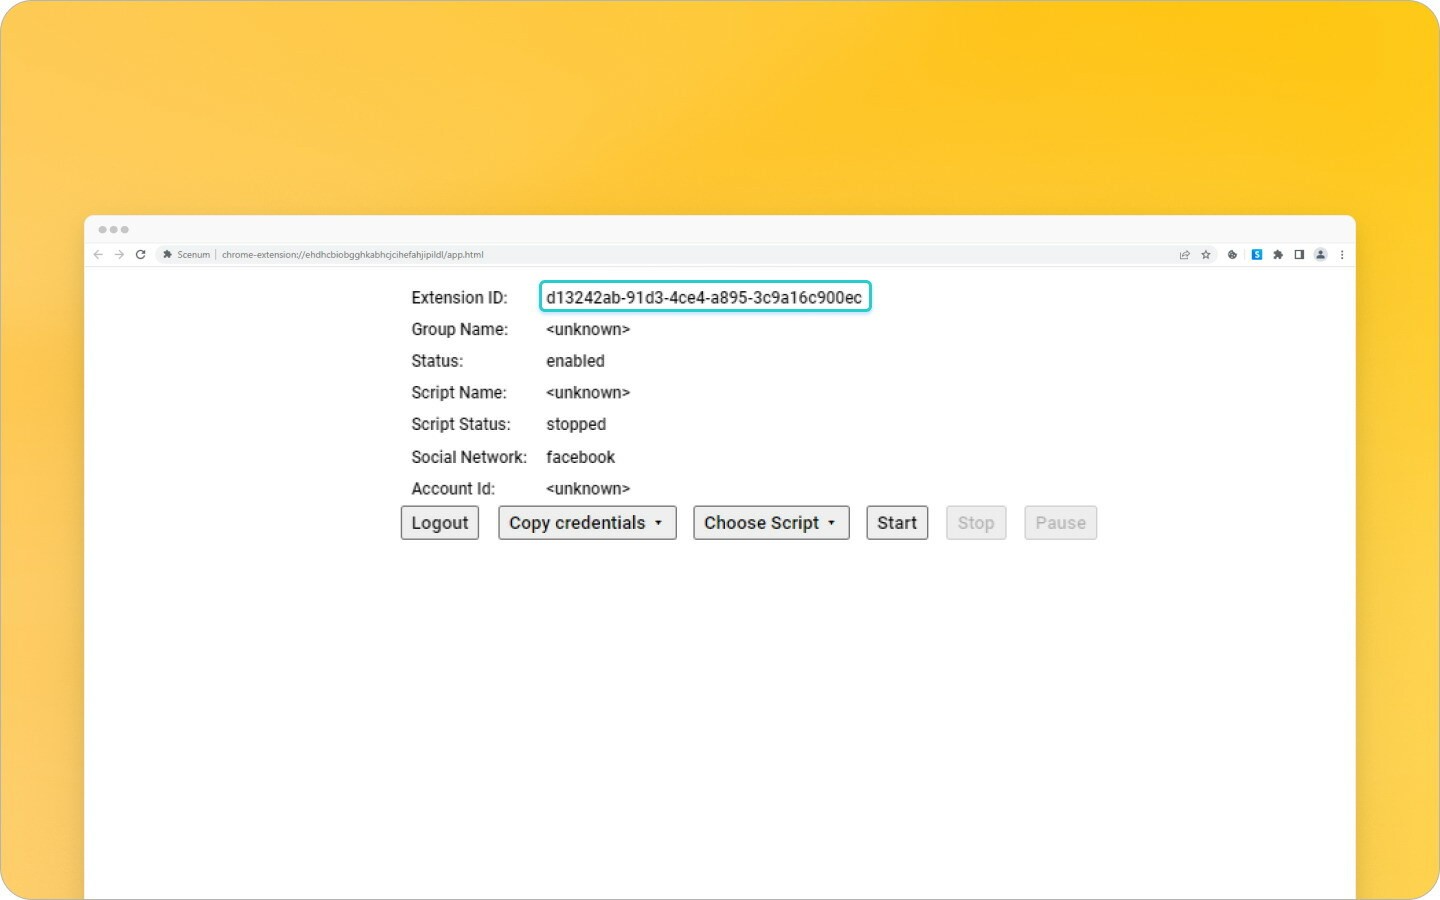
The first look at your personal Scenum account
Creating Octo Browser Profiles
Now we need to create some Octo Browser profiles and add the extension to the browser, but first things first: make sure to update Octo Browser to its latest version to use the latest API integration functionality.
Click on Create Profile and give it a name.
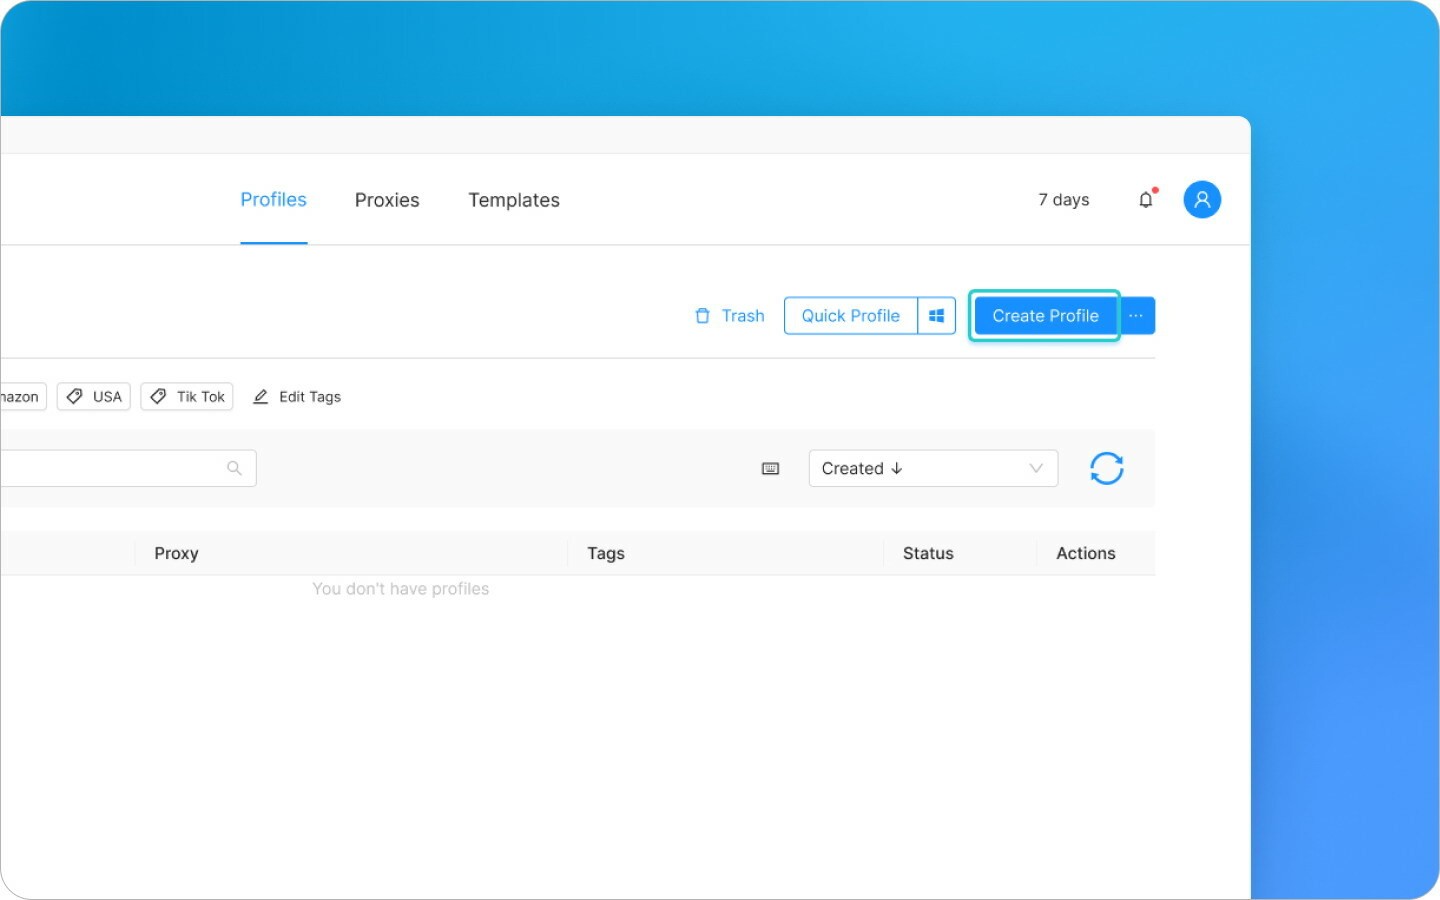
Creating Octo Browser profiles
Make sure that you toggle Extensions, Local Storage and Service workers on in the Storages settings of the profile. After that, click on Create profile.

Configuring an Octo Browser profile
Adding Scenum
Then we need to install the Scenum extension. To do so, start the profile, click on the three dots menu icon → More tools → Extensions.
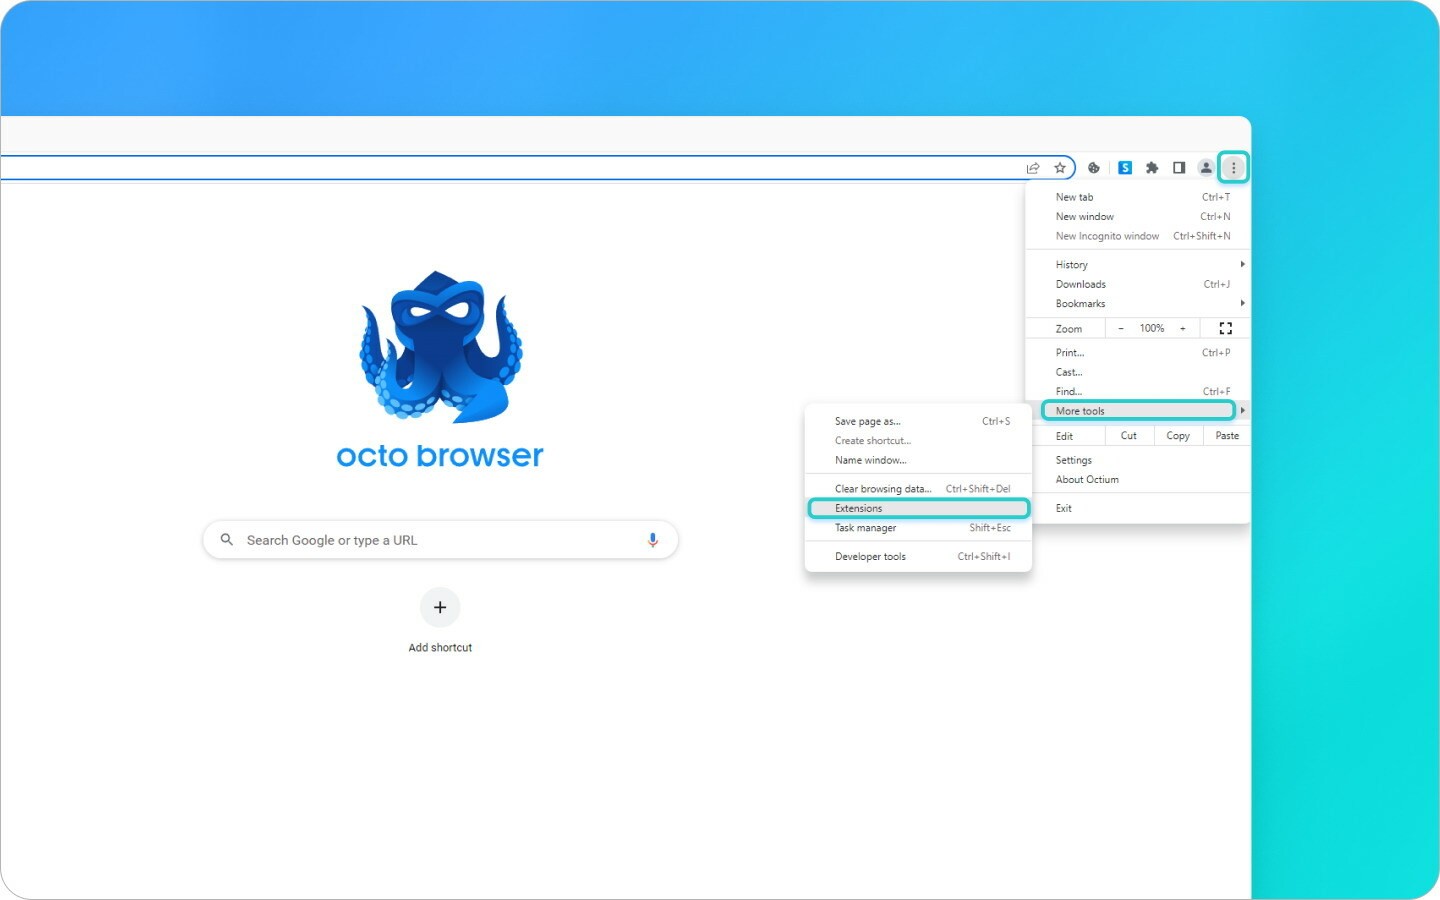
Installing Scenum
Toggle the Developer mode on and add the unpacked extension that you have received in the Scenum registration email.
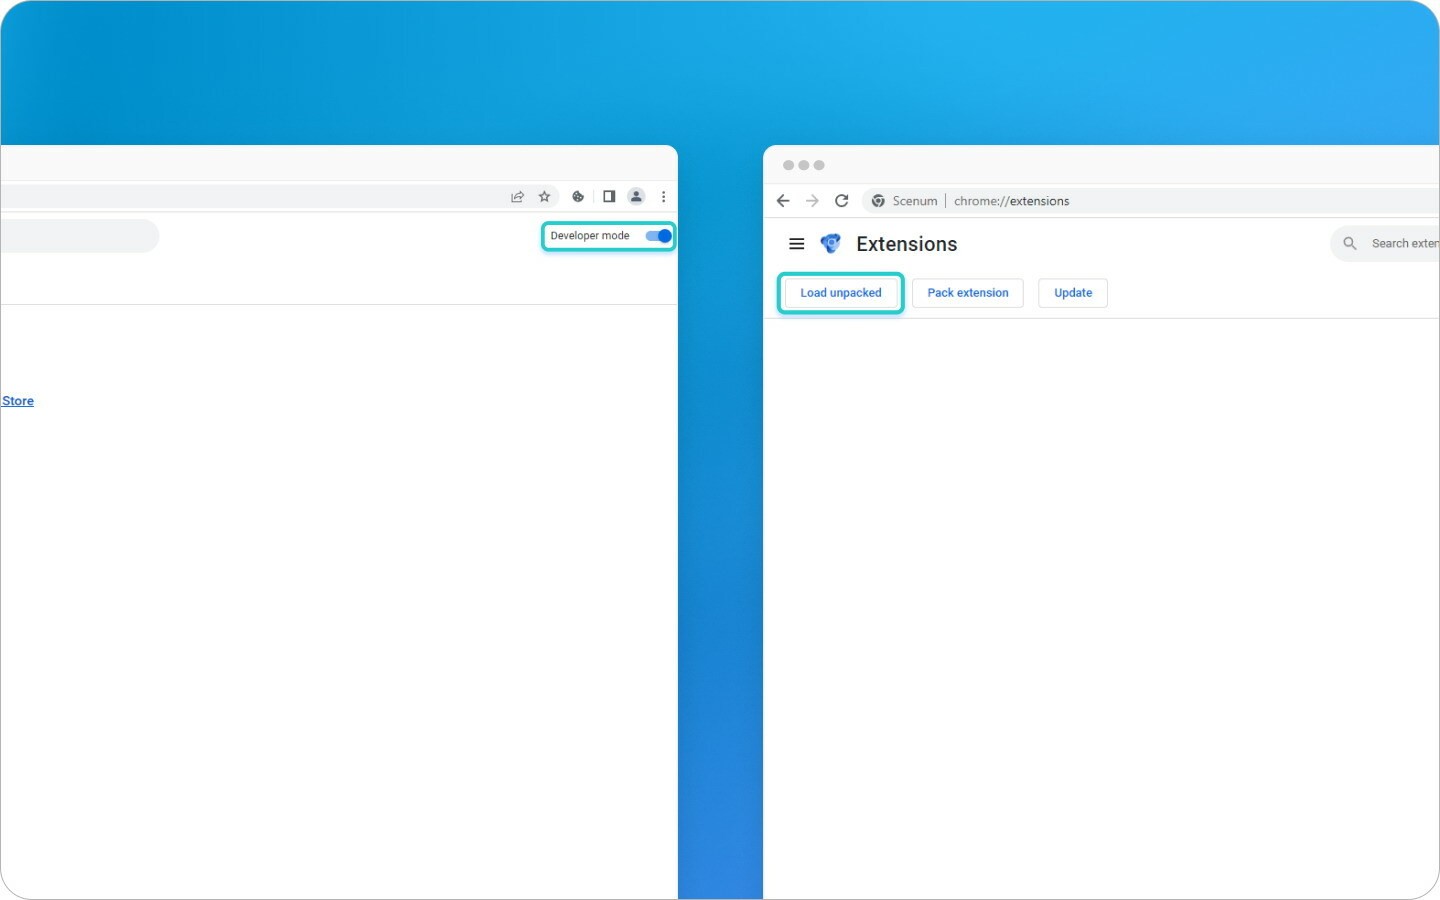
Load Scenum
After this you will see the Extensions tab in the browser.
Scenum has been successfully installed!
The extension will be enabled in the profile settings, and you will see it on the extensions list. You will not have to reinstall the extension in the future, you will only need to activate it in the profile settings.
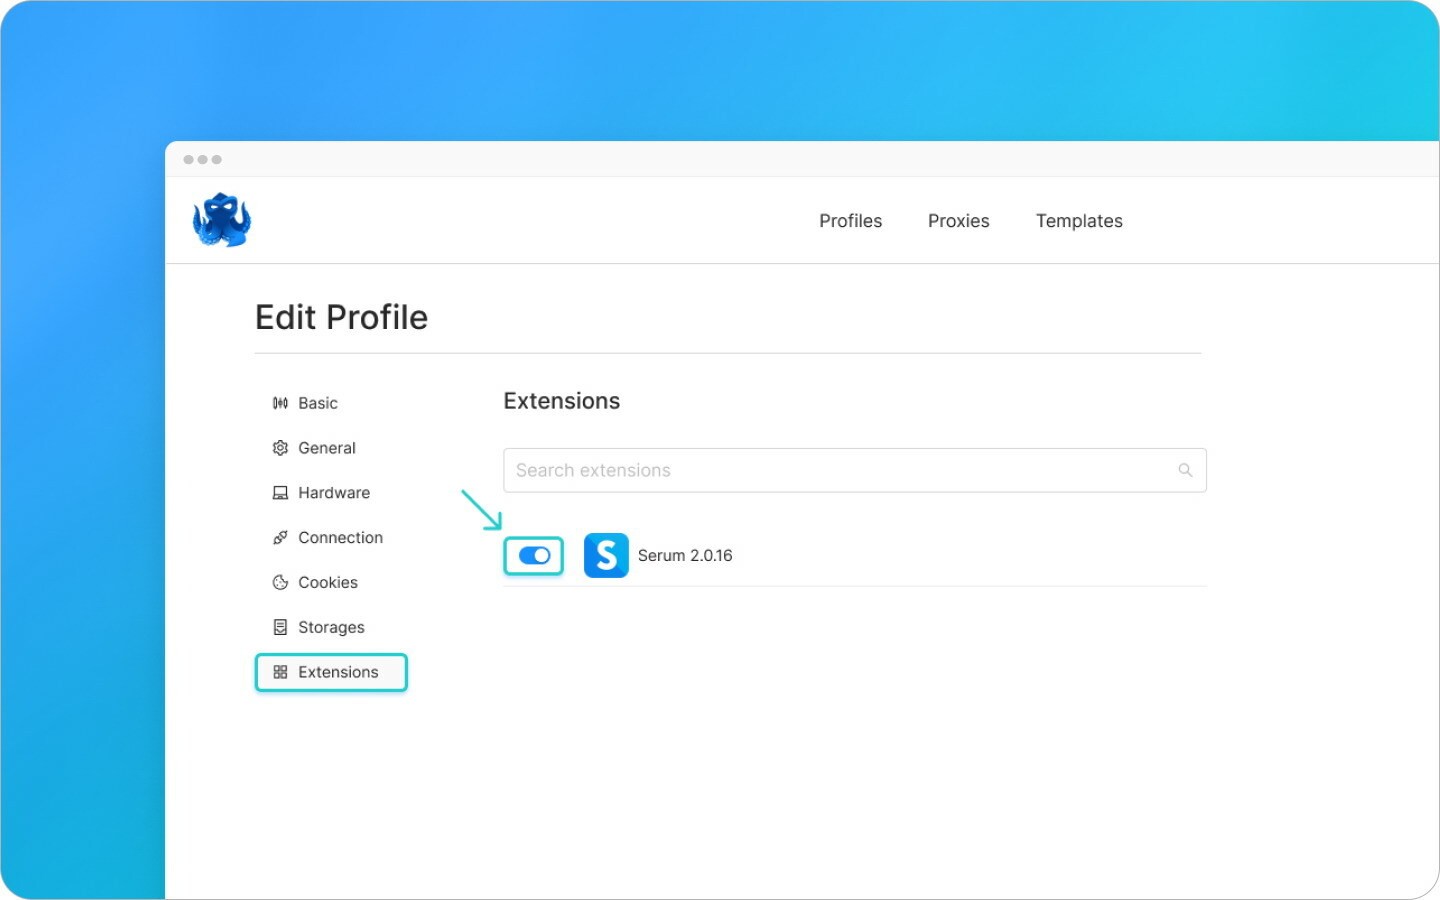
Activating the Scenum extension
After you have installed Scenum and started a profile with it, you will see a string corresponding to that profile’s extension in your personal Scenum account.
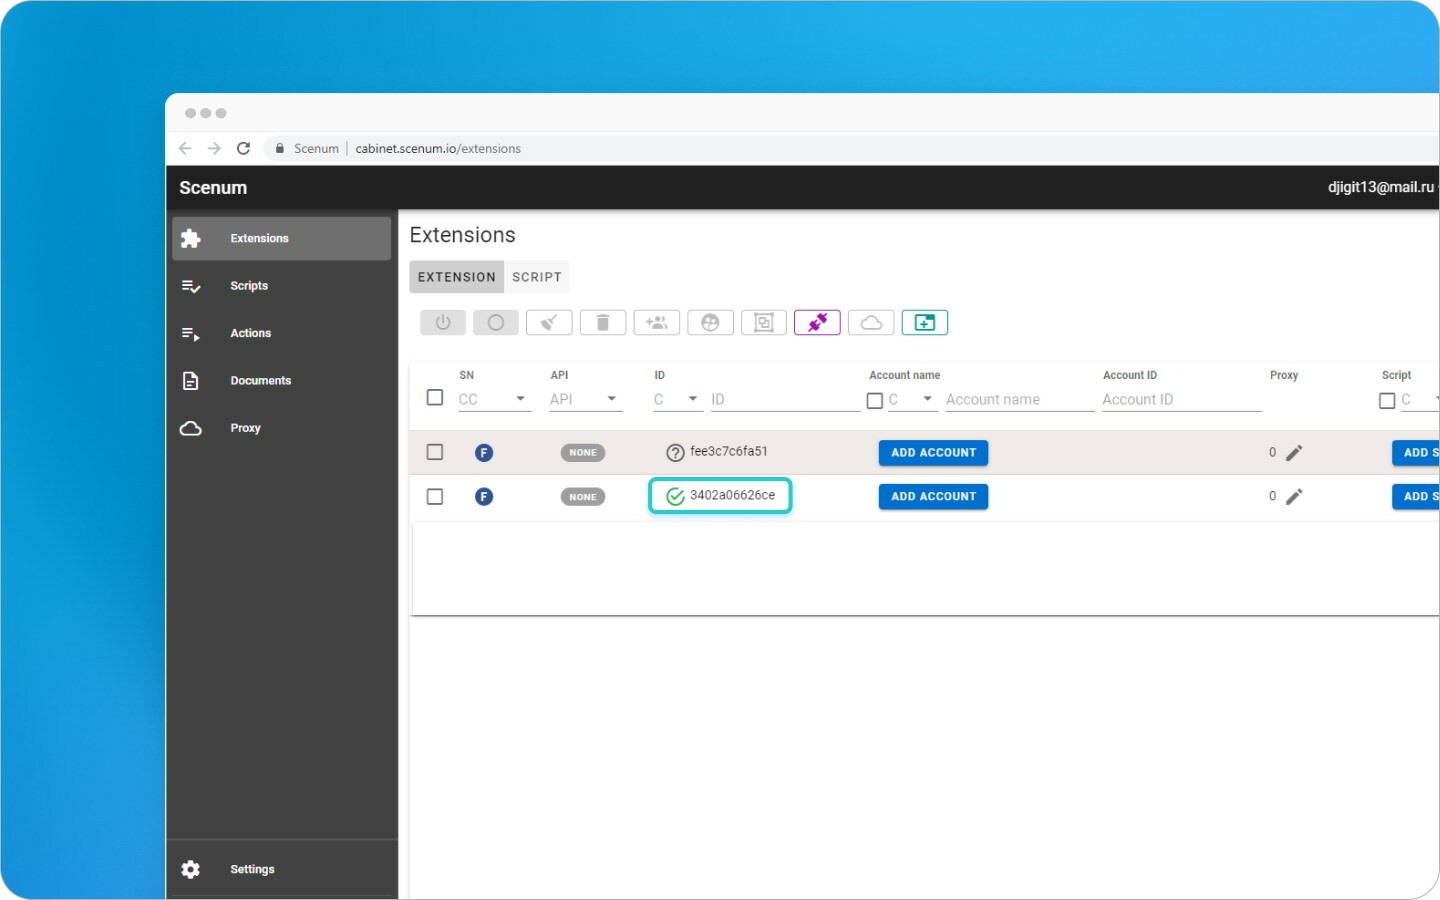
Profile extension string
Configuring and running scenarios
Now that the profiles have been created, you can set up and run scenarios. These contain separate actions that you can configure in your personal Scenum account in the Actions tab.
Configuring scenarios
To create a scenario, go to the Scenarios tab and choose the necessary social media. Add the steps you want and select the action type. When everything is ready, give the scenario a name and save it. If you need to edit it later, you can do so in the same tab.
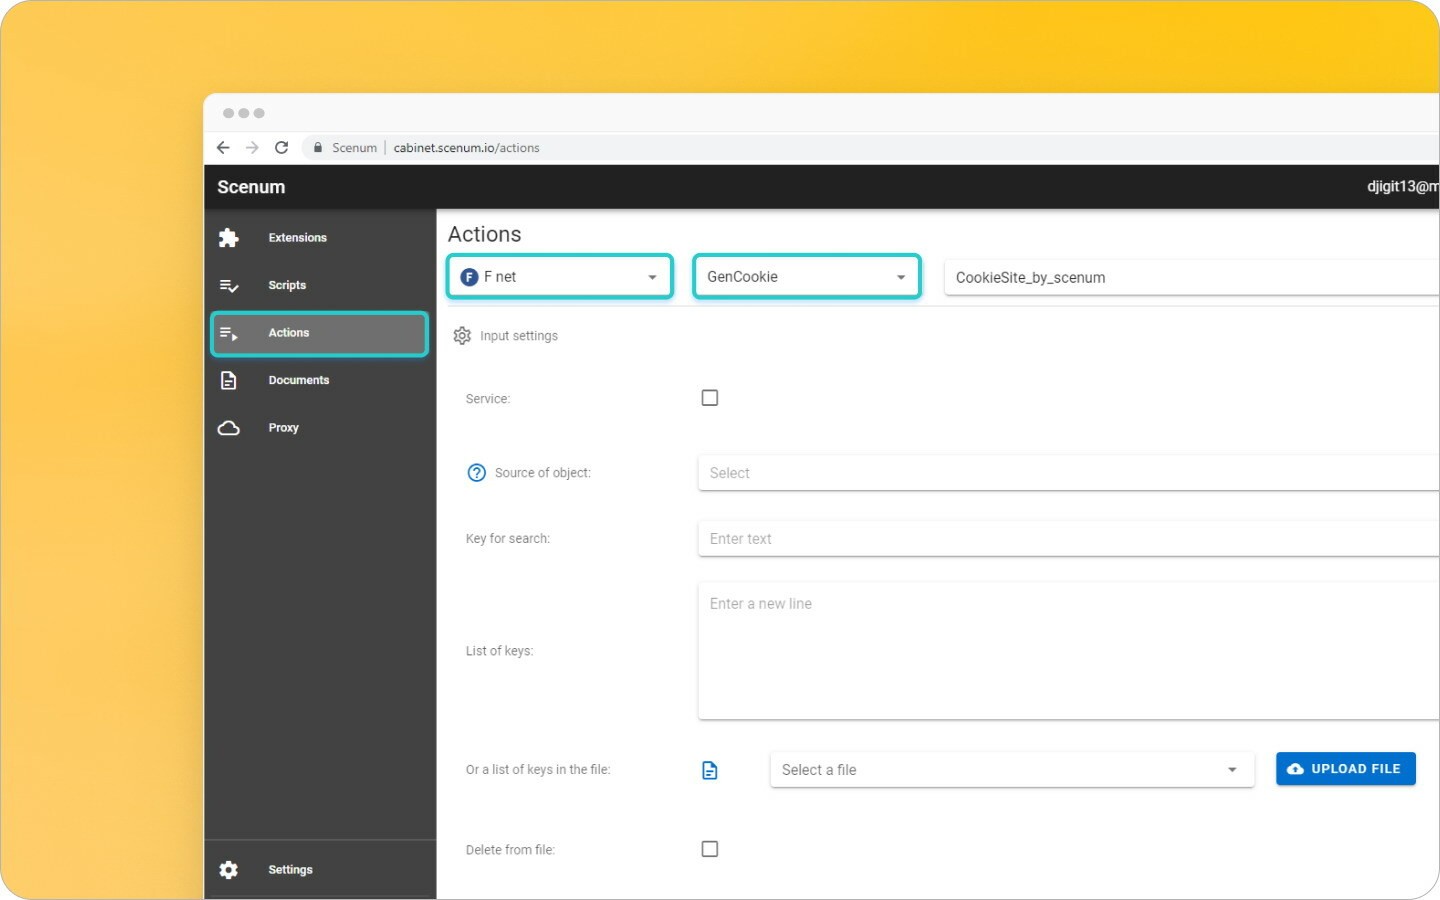
If you use mobile proxies with Octo Browser profiles working with Scenum, Scenum recommends setting up IP address change using the GenCookie action in the Mobile Proxy Reboot Mode, and adding it as the first action for all scenarios.
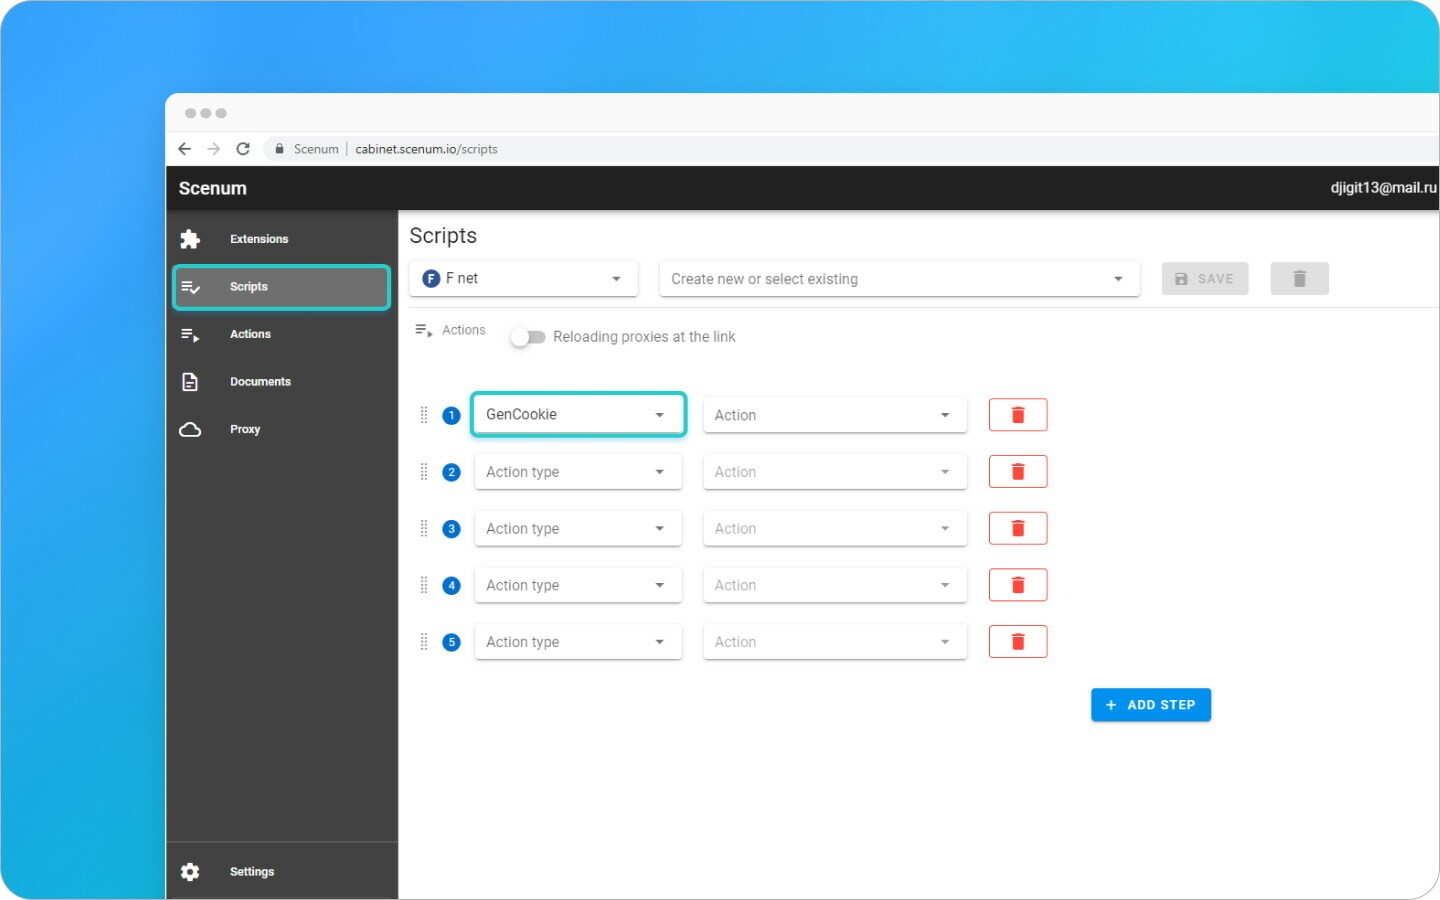
Configuring mobile proxies IP address change
If you are unsure as to exactly which action sequence you need, you can use a ready-made scenario provided by Scenum, which is set to run for 15 days. To do so, please contact Scenum technical support who will supply the scenario for free.
After the scenarios have been configured, you can run them using your personal account and start farming. Clicking on Start and Stop buttons of Octo Browser profiles running scenarios will open and close these profiles automatically.
Creating and configuring a template for bulk farming
We have seen how to create a profile, add the Scenum extension to it, and configure a scenario. This is enough to start farming accounts, so let’s go to the next step: we can optimize bulk profile creation using Octo Browser templates. Let’s see how this works.
A template is a sample pre-configured profile. To add an extension to a template, you need to install it in any profile first. As we have done so with the Scenum extension already, we can go directly to creating a template and profiles from that template.
To do so, let’s go to the Templates tab and click on Create Template.
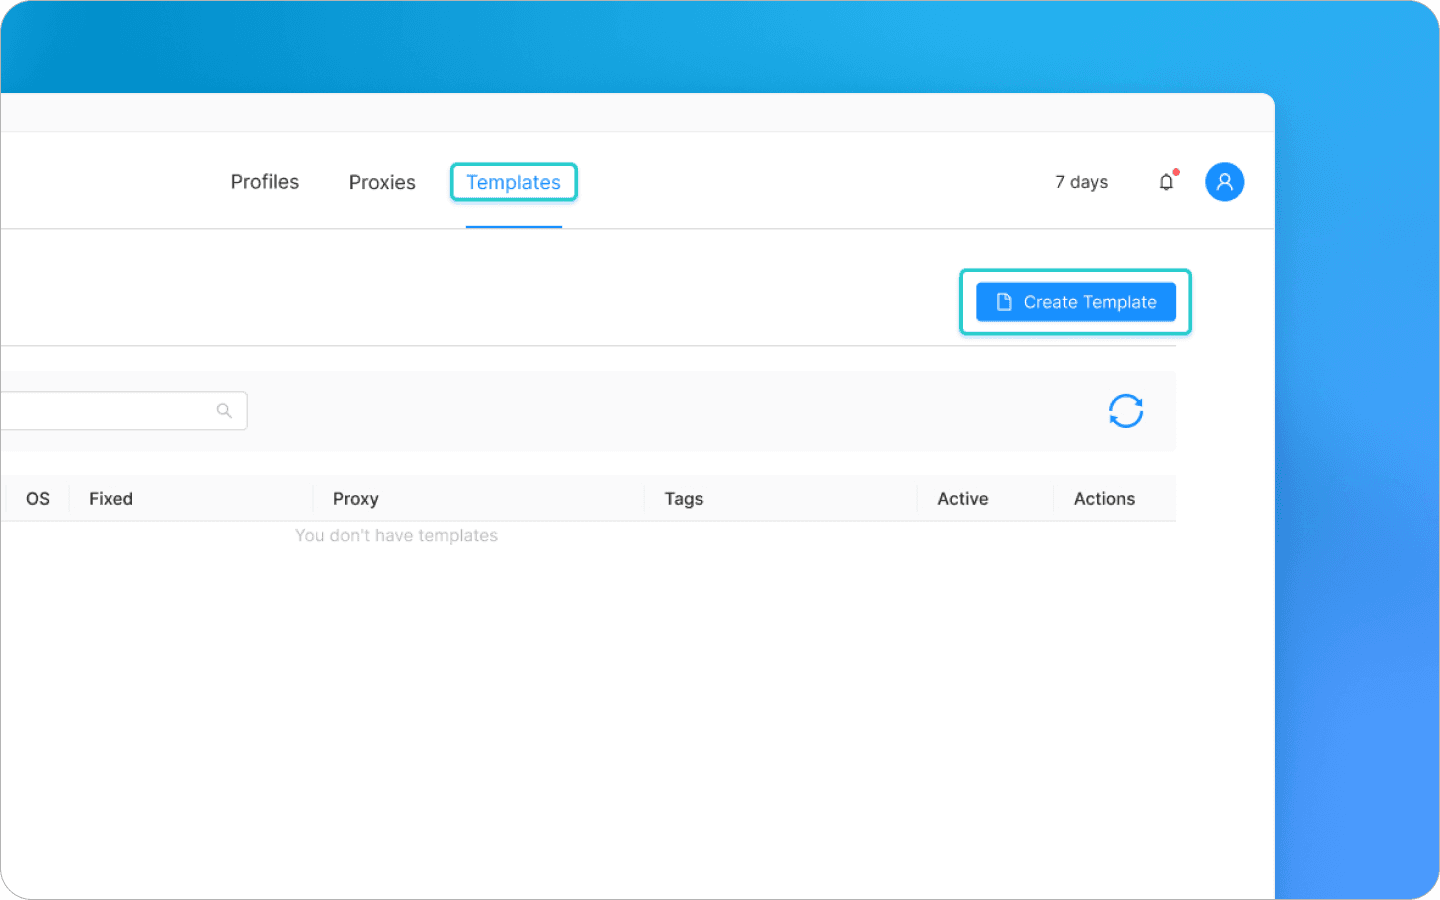
Creating an Octo Browser template
Give your template a name in the Basic settings, and don’t forget to toggle Extensions, Local Storage and Service workers on in Storages. Activate the Scenum extension in the Extensions tab. Click on Create Template in the bottom right corner and activate the template in the template list.

Activating an Octo Browser template
Now instead of repeating these actions every time you create a profile for farming, you can choose Quick Profile → Template, and the new profile will be created with the necessary settings.
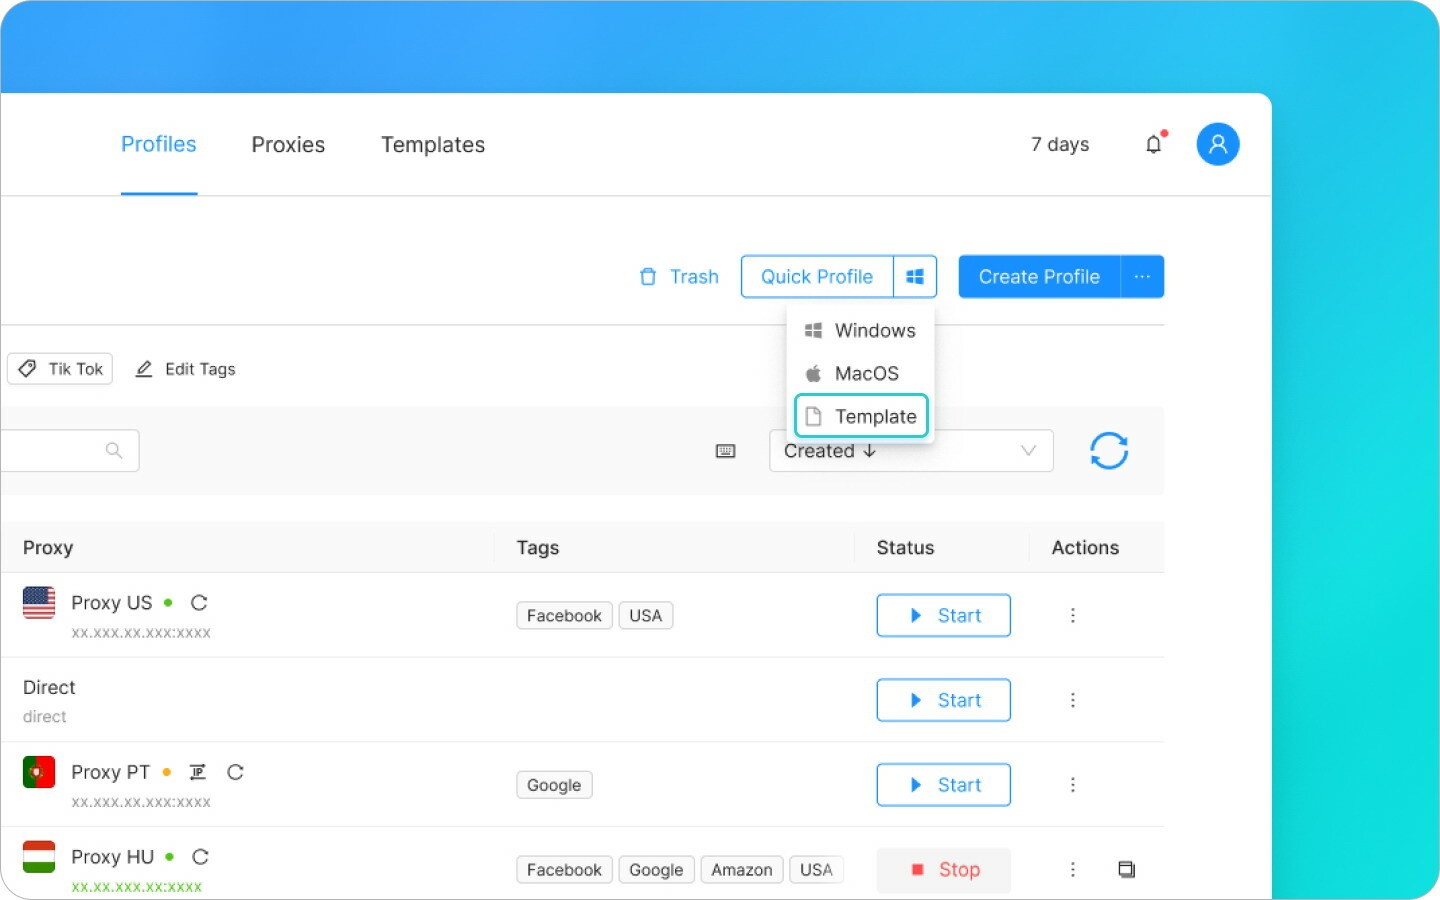
Using Octo Browser templates
When a template is set to arrive, all template parameters will also be applied if you make a profile using the Create Profile button.
Configuring automatic integration
Automatic integration allows you to control all extensions in your personal account simultaneously in one click. This requires additional setting up, but can save you a lot of time if you work with multiple profiles.
In this mode Octo Browser communicates with Scenum using API, so you'll need Base subscription or higher.
To connect to Octo Browser using API, you'll have to forward the port on your router and open the port on your device.
Select all profiles in your personal account and click on the automatic integration icon.

Port forwarding and router configuration
Select Octo Browser, specify port and host.
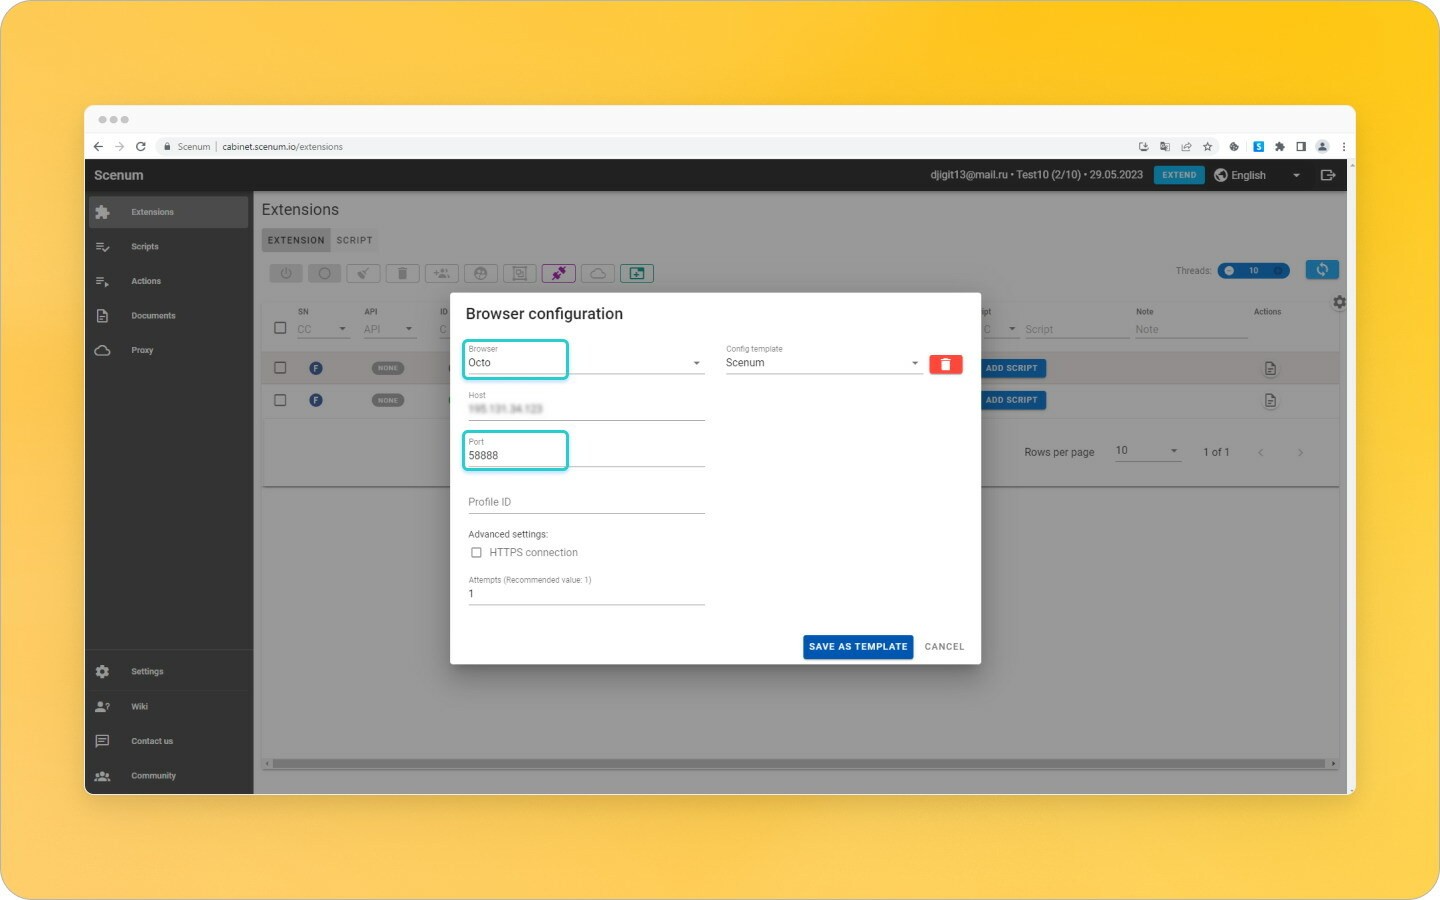
Configuring automatic integration
Action sequence is especially important when configuring automatic integration. After you see the extensions in your personal Scenum profile and you've saved the browser settings, you need to go back to Octo Browser, close all profiles, and start them again.
Now you need to refresh your personal Scenum account and click on the Octo Browser icon.
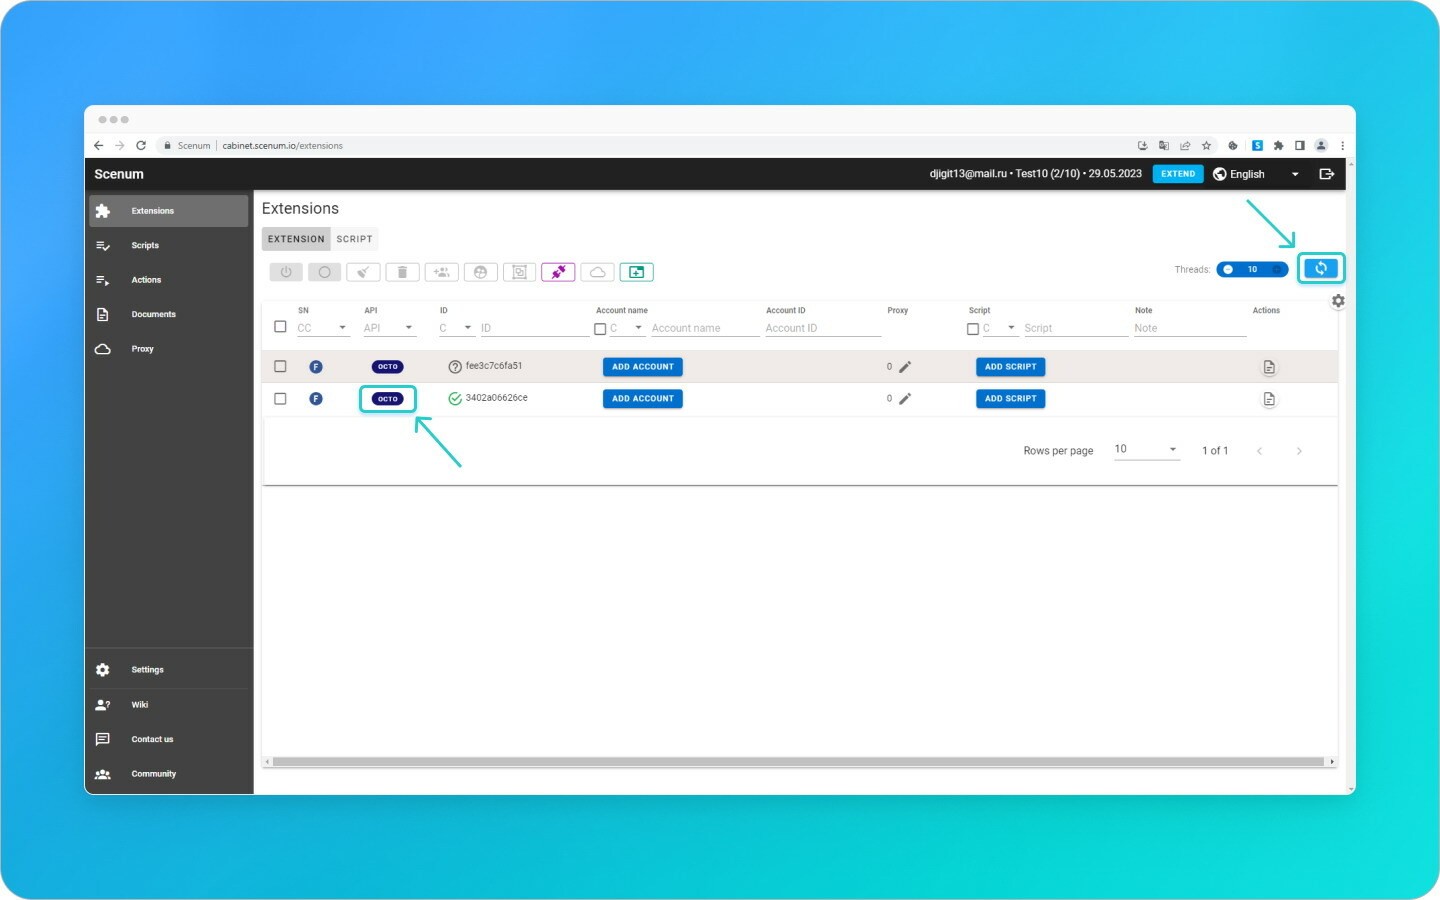
Competing automatic integration configuration
In the integration window you'll see that profile IDs have been collected automatically. Now you can select a scenario for one or several profiles and the number of profiles that should be working simultaneously.
Clicking the Start button will automatically launch profiles corresponding to the number of threads, with the rest of profiles waiting in the queue. Once a profile finishes its tasks, the next one in the queue will start working.
Editing extensions
To maximize the efficiency of Octo Browser and Scenum working in tandem, you might need to add a new SMS service, a GitHub token, a Telegram bot, or otherwise tweak how extensions work.
Octo Browser keeps all extensions in one folder. To add the necessary data to all profiles at the same time, you need to open any browser profile, find the path to the extension using the Scenum wiki manual, and edit credentials.json.
To learn more about configuring account farming, please consult the Scenum website and Knowledge Base. If you have not used Scenum before, but now you see that it can be useful for you, don’t forget to claim your 50% discount on any subscription plan for 1 month using the promo code OCTO. Happy farming!
Getting started with Scenum
Start by registering on the official website scenum.io. The service offers you a 7-day trial period, during which you can farm up to 10 accounts. If you leave them your Telegram handle, a personal manager will be assigned to you to help you set up the system with your particular needs in mind. Ready-made farming scenarios will also be available to you.
Activate your account after registering and log into it using the data you will have received by email. The message will also contain a link to the extension itself: download and unpack it into a separate folder, and you’re all set to go.
The first look at your personal Scenum account
Creating Octo Browser Profiles
Now we need to create some Octo Browser profiles and add the extension to the browser, but first things first: make sure to update Octo Browser to its latest version to use the latest API integration functionality.
Click on Create Profile and give it a name.
Creating Octo Browser profiles
Make sure that you toggle Extensions, Local Storage and Service workers on in the Storages settings of the profile. After that, click on Create profile.
Configuring an Octo Browser profile
Adding Scenum
Then we need to install the Scenum extension. To do so, start the profile, click on the three dots menu icon → More tools → Extensions.
Installing Scenum
Toggle the Developer mode on and add the unpacked extension that you have received in the Scenum registration email.
Load Scenum
After this you will see the Extensions tab in the browser.
Scenum has been successfully installed!
The extension will be enabled in the profile settings, and you will see it on the extensions list. You will not have to reinstall the extension in the future, you will only need to activate it in the profile settings.
Activating the Scenum extension
After you have installed Scenum and started a profile with it, you will see a string corresponding to that profile’s extension in your personal Scenum account.
Profile extension string
Configuring and running scenarios
Now that the profiles have been created, you can set up and run scenarios. These contain separate actions that you can configure in your personal Scenum account in the Actions tab.
Configuring scenarios
To create a scenario, go to the Scenarios tab and choose the necessary social media. Add the steps you want and select the action type. When everything is ready, give the scenario a name and save it. If you need to edit it later, you can do so in the same tab.
If you use mobile proxies with Octo Browser profiles working with Scenum, Scenum recommends setting up IP address change using the GenCookie action in the Mobile Proxy Reboot Mode, and adding it as the first action for all scenarios.
Configuring mobile proxies IP address change
If you are unsure as to exactly which action sequence you need, you can use a ready-made scenario provided by Scenum, which is set to run for 15 days. To do so, please contact Scenum technical support who will supply the scenario for free.
After the scenarios have been configured, you can run them using your personal account and start farming. Clicking on Start and Stop buttons of Octo Browser profiles running scenarios will open and close these profiles automatically.
Creating and configuring a template for bulk farming
We have seen how to create a profile, add the Scenum extension to it, and configure a scenario. This is enough to start farming accounts, so let’s go to the next step: we can optimize bulk profile creation using Octo Browser templates. Let’s see how this works.
A template is a sample pre-configured profile. To add an extension to a template, you need to install it in any profile first. As we have done so with the Scenum extension already, we can go directly to creating a template and profiles from that template.
To do so, let’s go to the Templates tab and click on Create Template.
Creating an Octo Browser template
Give your template a name in the Basic settings, and don’t forget to toggle Extensions, Local Storage and Service workers on in Storages. Activate the Scenum extension in the Extensions tab. Click on Create Template in the bottom right corner and activate the template in the template list.
Activating an Octo Browser template
Now instead of repeating these actions every time you create a profile for farming, you can choose Quick Profile → Template, and the new profile will be created with the necessary settings.
Using Octo Browser templates
When a template is set to arrive, all template parameters will also be applied if you make a profile using the Create Profile button.
Configuring automatic integration
Automatic integration allows you to control all extensions in your personal account simultaneously in one click. This requires additional setting up, but can save you a lot of time if you work with multiple profiles.
In this mode Octo Browser communicates with Scenum using API, so you'll need Base subscription or higher.
To connect to Octo Browser using API, you'll have to forward the port on your router and open the port on your device.
Select all profiles in your personal account and click on the automatic integration icon.
Port forwarding and router configuration
Select Octo Browser, specify port and host.
Configuring automatic integration
Action sequence is especially important when configuring automatic integration. After you see the extensions in your personal Scenum profile and you've saved the browser settings, you need to go back to Octo Browser, close all profiles, and start them again.
Now you need to refresh your personal Scenum account and click on the Octo Browser icon.
Competing automatic integration configuration
In the integration window you'll see that profile IDs have been collected automatically. Now you can select a scenario for one or several profiles and the number of profiles that should be working simultaneously.
Clicking the Start button will automatically launch profiles corresponding to the number of threads, with the rest of profiles waiting in the queue. Once a profile finishes its tasks, the next one in the queue will start working.
Editing extensions
To maximize the efficiency of Octo Browser and Scenum working in tandem, you might need to add a new SMS service, a GitHub token, a Telegram bot, or otherwise tweak how extensions work.
Octo Browser keeps all extensions in one folder. To add the necessary data to all profiles at the same time, you need to open any browser profile, find the path to the extension using the Scenum wiki manual, and edit credentials.json.
To learn more about configuring account farming, please consult the Scenum website and Knowledge Base. If you have not used Scenum before, but now you see that it can be useful for you, don’t forget to claim your 50% discount on any subscription plan for 1 month using the promo code OCTO. Happy farming!
Stay up to date with the latest Octo Browser news
By clicking the button you agree to our Privacy Policy.
Stay up to date with the latest Octo Browser news
By clicking the button you agree to our Privacy Policy.
Stay up to date with the latest Octo Browser news
By clicking the button you agree to our Privacy Policy.

Join Octo Browser now
Or contact Customer Service at any time with any questions you might have.
Join Octo Browser now
Or contact Customer Service at any time with any questions you might have.
Join Octo Browser now
Or contact Customer Service at any time with any questions you might have.